Microservices: .Net, Linux, Kubernetes and Istio make a powerful combination
Introduction
This is a step-by-step guide for configuring deploying .Net Alpine containers into an on-premise Kubernetes installation with an Istio proxy. In developing with this stack for my own solution, I found the content scattered all over the web or the documented solution to the problem tangential to what I was trying to solve. If this post saves you a few extra minutes (or hours) searching the web for instructions, then job done.
The article has been split into 2 posts. This entry focuses on the technical step by step, while the “.Net + Kubernetes Lessons” post provides more detail behind the technology, what worked well and what didn’t.
Objectives
- Set-up and build a bare-metal (or Virtual Machine) Kubernetes deployment.
- Use Istio as the L7 Proxy and Mesh management for Linux Alpine based .Net Docker containers.
- Code and build on Windows and deploy to a Linux host.
- Use a private Git repository and CI/CD server to automate the build process and provide NuGet code sharing.
- Learn how the basic components fit together through installation and configuration as opposed to automated deployments such as OpenShift.
- Understand the end-to-end stack for future production deployments to the cloud.
Out of Scope
- It’s not an education on IoC or any other software design principles. There are many, many articles (Google suggests ~308 million pages for the search term software design principles) on software design. Any code examples in here are enough to demonstrate the objective or are included as part of a used framework.
- In much the same way as I’m not writing IoC examples, the software tests aren’t included in here although they can be completed and executed within TeamCity.
- The deployment here used an old (ish, still had a SSD, core i7 and 16GB of memory) desktop sitting around as the target build server. If you’re going to build a private (cloud hosted or on-premise) Git and CI/CD server, you will need to implement your own backup strategies. These are not covered here.
- I’ve used a framework not only to illustrate how something may be used, but also because I've found ServiceStack (link below) to be an excellent framework for creation of Restful services. You'll likely have your own framework preferences, but I recommend checking it out.
- It’s not the start of a fundamentalist war regarding language selection. Here is an example of Fortran in your containers. I use .Net in addition to many other languages for different situations
Why do this?
I’m in the middle of building a cloud-scale product. You’d should be at least considering containerisation during your architecture phase for any new platforming in 2018 and beyond. Ideally, I’d like to have the platform grow from thousands through to millions of users without significant rework (some is unavoidable). As part of the learnings, there was a not-insignificant amount of web crawling to find out all the different aspects required to build a platform, even if it was just consuming vendor documentation. This was an opportunity to bring it together in one place for fellow developers.
Think through your cost/performance requirements however. Although infrastructure as code and containerisation does wonders for portability and construction, the flexibility does incur overhead even with massive scale-out. You may need to select your container networking stack very carefully to take advantage of implementations such as Netmap/VALE, DPDK, XDP or similar, especially if you have high I/O or low latency requirements.
Components
Installing Docker (on Windows)
Assumptions
- Successfully installed Windows 7, 8.1 or 10 64-bit on a bare-metal machine or VM
Download the latest Docker Community Edition for Windows which will require you to register an account with Docker. This is pretty straightforward, but a couple of recommendations:
- Install Docker with the option set to run Windows containers and then change to run Linux containers after it’s all up and running. You can do this by Right-Clicking on the Docker Whale in your Status Bar and clicking “Switch to Linux Containers”. When I was doing the orginial development behind this article, I was having a few issues with container creation that disappeared when I installed it this way around.
- If you’re developing on a modern laptop that doesn’t have an in-built RJ45 (such as mine), you’ll find adding a dock or dongle to add a wired ethernet connection makes container networking much easier. A user-defined bridge is configured later in the article which makes a dongle a worthwhile investment.
Building the Container
Assumptions
- Successfully installed Windows 7, 8.1 or 10 64-bit on a bare-metal machine or VM instance with Visual Studio 2017 (15.3) also installed
- Successfully installed the latest .Net Core SDK
- Successfully installed the GitHub Extension for Visual Studio
Setting up the Visual Studio Solution (Windows Development Machine)
Skip this section if you’ve already got NuGet up and running otherwise
- Browse to Nuget and download the latest x86 command line tool. Save to a local folder such as C:\Tools\Nuget.
- Add the Nuget executable to to your path. Use this article as a reference to make an addition to your environment variables. Restart Visual Studio if you already have it open.
- Create a new folder for your project to live in e.g. C:\Demo
- Open Visual Studio
- Browse to Tools -> NuGet Package Manager -> Package Manager Console and you should see the Console window appear with a prompt for PM>
- Navigate to the folder you created in the command prompt i.e. cd \Demo
- Execute the following in the Package Manager Console:
npm install -g @servicestack/cli dotnet-new razor MyService.InContainerThe steps above will preload a new .Net Core project using the ServiceStack framework. For the purposes of this exercise, I've chosen the Razor base template, even though I'm just creating a Backend for Frontend Service (see .Net + Kubernetes Lessons). ServiceStack includes a bunch more options for templates including React Bootstrap, Vue, Angular 5 and just a plain old empty site if you want to hand roll your own. Checkout the options here and also for some additional debugging tips on getting the inital project up and running.
Open the newly created solution and hit F5 to get your first look at the baseline template which we will use for testing our deployment through to Source Control and into our Kubernetes Cluster. We'll make one change for now, which is to show the application version on the home page.
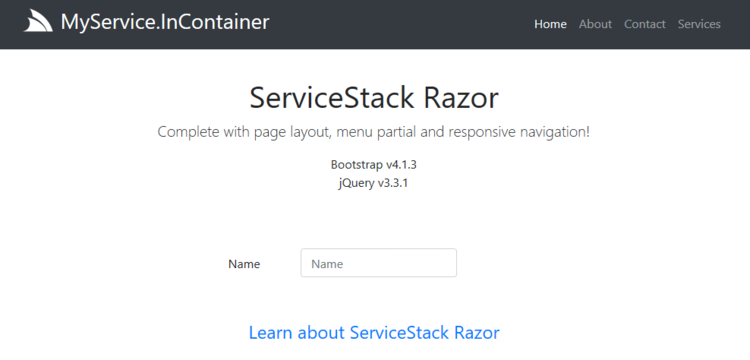
- In Visual Studio, open the MyService.InContainer/wwwroot/default.cshtml
- Add the following line under Bootstrap and jQuery list
<p>Application Version: @System.Reflection.Assembly.GetEntryAssembly().GetName().Version.ToString()</p>- Save and F5 to run.
We'll use that change in application version to demonstrate upgrading the containers in the Kubernetes deployment.
In preparation for the container, add a new .Net Standard Class Library project to your solution with a logical name like MyService.InContainer.ContainerFiles. Delete the Class1.cs file from the project as you're not going to need it here.
In this project, add the additional support files you may need for building the container. By having them as part of the project, it makes it easier to push them to Bitbucket and still use them for local builds. You'll need those files accessible by TeamCity via Git to be able to manage the build.
In the ContainerFiles project, I added 200x300.jpg, 460x300.jpg and demo.json. They are all dummy content but the way the Dockerfile is configured to expect them, it will fail if they're not there. Either modify the Dockerfile to remove or insert those files into the project.
Back in your Package Manager Console, run the following commands:
type NUL > C:\Demo\MyService.InContainer\Dockerfile
type NUL > C:\Demo\MyService.InContainer\.dockerignore
type NUL > C:\Demo\MyService.InContainer\docker_build.bat
type NUL > C:\Demo\MyService.InContainer\docker_cycle.bat
type NUL > C:\Demo\MyService.InContainer\docker_start.bat
type NUL > C:\Demo\MyService.InContainer\docker_stop.bat
All those commands will throw an error complaining that it cannot find the path. Ignore as it's done the job of creating six empty files in the root of the Solution folder which we can paste further commands into.
- Right-click on the Solution in the Solution Explorer and Add > Existing Item.
- Check both the Dockerfile and the .dockerignore files and all the bat files you have just created
- Double-click on the .dockerignore file to edit it and paste/save the content below :
.dockerignore
.env
.git
.gitignore
.vs
.vscode
current.version
*.bat
docker-compose.yml
docker-compose.*.yml
*/bin
*/obj- Double click on the Dockerfile to edit it and paste/save the content below :
#*** Start of Section 1 - Build your project using the bigger SDK container ***#
FROM microsoft/dotnet:2.1-sdk-alpine AS build
WORKDIR /ctr

# Copy csproj and restore as distinct layers.  If you have many project files,
# check out the two references at the bottom that use 7zip tar files to bundle
# everything up and unpack in another step
COPY ./*.sln .
COPY ./*.Config .
COPY ./MyService.InContainer/*.csproj MyService.InContainer/
COPY ./MyService.InContainer.ContainerFiles/*.csproj MyService.InContainer.ContainerFiles/
COPY ./MyService.InContainer.ServiceInterface/*.csproj MyService.InContainer.ServiceInterface/
COPY ./MyService.InContainer.ServiceModel/*.csproj MyService.InContainer.ServiceModel/
COPY ./MyService.InContainer.Tests/*.csproj MyService.InContainer.Tests/

RUN dotnet restore

# Copy everything else and build app
COPY . ./MyService.InContainer/
WORKDIR /ctr/MyService.InContainer
RUN dotnet publish MyService.InContainer.sln -c Release -o out

#*** End of Section 1 ***#

#*** Start of Section 2 - Select target runtime container and copy all files in preparation ***#
FROM microsoft/dotnet:2.1-runtime-alpine AS runtime
WORKDIR /ctr

# Copy the compiled binaries from the build container in Section 1
COPY --from=build /ctr/MyService.InContainer/MyService.InContainer/out ./

# Copy any files you may wish to use in the target container, including images or other assets.
# Putting them in a sub-project makes them far easier to manipulate in the TeamCity build
# server.
# See use of Z-Zip and tar below to back multiple files in this step and unpack in the
# container.
WORKDIR /assets

COPY ./MyService.InContainer.ContainerFiles/200x300.jpg .
COPY ./MyService.InContainer.ContainerFiles/460x300.jpg .
COPY ./MyService.InContainer.ContainerFiles/demo.json .

# Install any other Alpine Linux binaries you require in your container, but only the minimum necessary
# to reduce the available attack surface.  Note the use of apk update for Alpine vs.
# apt-get for Debian based distros.  You'll need to chop and change if you
# change your base container image.
RUN echo "http://dl-cdn.alpinelinux.org/alpine/edge/testing" >> /etc/apk/repositories
RUN echo "http://dl-cdn.alpinelinux.org/alpine/edge/main" >> /etc/apk/repositories
RUN apk update
RUN apk --no-cache --no-progress upgrade && apk --no-cache --no-progress add bash curl ip6tables iptables

WORKDIR /ctr

# Tell Docker what to launch on Startup.  For this  ASP.Net core app it will entry into
# public static void Main(string[] args) in Program.cs.  If you want to run multiple
# binaries or initialisation routines, create a bash script which you can then
# run both the dotnet launcher and any other components required
ENTRYPOINT ["dotnet", "MyService.InContainer.dll"]
I posted a question on StackOverflow regarding a more elegant way to bundle Visual Studio Project files which has been answered by myself and VonC. I'd also recommend reading Andrew Lock's post on avoiding manually copying csproj files.
Earlier we installed Docker on the development machine and now we'll dive into some CLI to get the container up and running. In order to make this a bit quicker, we'll create a couple of scripts that you can execute multiple times on your development machine as you'll find yourself tearing up and down the containers.
Because I wanted to access the containers on my local network via port mapping to the container network that Docker manages, I needed to set up a bridged network adapter. It will help immensely if you have two network adapters, which in my case was the built-in wifi in my laptop and a Thunderbolt-3 ethernet dongle. On the assumption you're running Windows 10, here is a good article from Windows Central on configuring a network adapter in bridge mode
In Visual Studio
- Right-click the default project MyService.InContainer and select Properties.
- Click on Package and specify your Package version. I used 1.0.0.1 but feel free to use whatever standard you prefer. We'll use this later for creating the local Docker image version.
- Click on Build Events and paste the following into the Post-build event command line:
echo >/dev/null # >nul & GOTO WINDOWS & rem ^
echo 'Build on Linux container, skip windows'
exit 0

:WINDOWS
echo 'Build on Windows'
set PATHFILE=$(TargetPath.Replace("\", "\\"))
for /F "delims== tokens=2" %%x in ('wmic datafile where "name='%PATHFILE%'" get Version /format:Textvaluelist')  do (set DLLVERSION=%%x)
echo %DLLVERSION%> ..\current.version
There are two parts to this Post-build script. The first 3 lines deal solely with setting up the dotnet publish line in our Dockerfile. As the image is targeting Alpine, building the image will cause it to error on Windows batch instructions. By using the common language commands of echo and exit, the first 3 lines can run on either platform. Windows will jump to the GOTO command, where Linux will continue and hit the exit on the current process. Don't change the echo to uppercase because it looks pretty. Linux is case-sensitive!
The second part of the script, is used by Visual Studio to query the compiled project dll file using the wmic utility to get the version number you set earlier in the Project Package tab. It saves this as a single-line text file which can be consumed by Docker, TeamCity and Kubernetes.
- Double-click on the docker_build.bat file that was created earlier and added to your Solution Items. Paste the following into the batch file and save the file:
@ECHO OFF
SET IMAGE=%~1
SET NOCACHE=%~2
IF NOT DEFINED NOCACHE (SET NOCACHE=-uc)
SET /p BUILD=<current.version
ECHO Creating Docker Image for version %BUILD% with image name %IMAGE% with cache flag set to %NOCACHE%
IF /I "%NOCACHE%"=="-nc" (
    ECHO Forcing full rebuild
    docker build --no-cache -t %IMAGE%:%BUILD% .
) ELSE (
    ECHO Using build cache
    docker build -t %IMAGE%:%BUILD% .
)
@ECHO ON- The above build script will use the version file and a command line argument to create the local docker image. The -nc switch tells docker to ignore any previously cached build steps and perform a full rebuild from the start, including pulling any changes from repos.
- Double-click on the docker_start.bat file and paste/save the following:
@ECHO OFF
SET IMAGE=%~1
SET CONTAINER=%~1
SET /p BUILD=<current.version
docker run --net localnet --dns=1.1.1.1 --dns=9.9.9.9 -d -p 10100:80 --name %CONTAINER% %IMAGE%:%BUILD%
docker ps -aqf "name=^/%CONTAINER%$" > temp.txt
SET /p CONTAINERID= < temp.txt
docker exec -it --privileged %CONTAINERID% bash
DEL temp.txt
@ECHO ON- A couple of items to point out in this docker_start script. docker_startup is using the image name by command-line argument to also create the container although this isn't strictly necessary. It is just used here to minimise the typing of arguments. The Docker run command is also set to run in daemon mode with the -d command which is fine when everything is running correctly. The additional piece with docker exec, starts another shell and attaches to the daemon process which is useful for debugging.
- Double-click on the docker_stop.bat file and paste/save the following:
@ECHO OFF
SET IMAGE=%~1
docker stop %IMAGE%
docker container rm %IMAGE%
@ECHO ON- Double click on the docker_cycle.bat file and paste/save the following:
@ECHO OFF
SET IMAGE=%~1
SET NOCACHE=%~2
IF NOT DEFINED NOCACHE (SET NOCACHE=-uc)
CLS
CALL docker_stop.bat %IMAGE%
CALL docker_build.bat %IMAGE% %NOCACHE%
CALL docker_start.bat %IMAGE%
@ECHO ON- Start a Windows Command prompt and navigate to the direction of your solution folder (where your Dockerfile and the batch files you created earlier are saved). Do a basic check that docker is running with the docker ps command. You should also see the Docker Whale in your notification tray indicating that Docker is running :
docker image ls- Docker should list the available images here that you have on your local machine. To build the container, run the following command :
docker_build mycontainerservice- Note: Docker only likes lowercase names, but feel free to use pathing in your naming constructs e.g. project/some-container
- On a successful image build, you will see a large number of steps running with a final message "SECURITY WARNING: You are building a Docker image from Windows against a non-Windows Docker host. All files and directories added to build context will have '-rwxr-xr-x' permissions. It is recommended to double check and reset permissions for sensitive files and directories."
- Create a docker container network against which to instantiate your containers, where you can substitute the subnet with your preferred subnet. Pick a subnet that your development machine is not using:
docker network create --driver=bridge --subnet=192.168.0.0/24 localnet
docker_start mycontainerservice
On successful launch of your container, you should be presented with a bash script prompt:
C:\Demo\MyService.InContainer>docker_start mycontainerservice
7622a5c1965e3dd2824654136f8e04b417e0b593dc73da44b4e912fa412a8261
bash-4.4#
Where the long hexedecimal string is the unique container instance on your Docker engine i.e. it won't be the same as above. Type 'exit' to return to the normal Windows command prompt. The script that we haven't run is the docker_cycle mycontainerservice which calls docker_stop, docker_build and docker_start in that order which is just a faster way of cycling your container once you've made code changes and you need a coffee while it's launching the container.
Some useful Docker commands:
Check to see if there are any containers running
docker psFind the assigned internal IP address of the container (useful if you're trying to debug local inter-container communications)
docker inspect --format="{{range .NetworkSettings.Networks}}{{.IPAddress}}{{end}}" mycontainerserviceDump all the container instance settings to a JSON file for inspection
docker inspect mycontainerservice > mycontainerservice.jsonPull an image from the default repo (Docker), in this case the 2.1.5 Alpine SDK from the dotnet public repo down to your local repo for consumption.
docker pull microsoft/dotnet:2.1.500-sdk-alpineInstalling PostGres
Assumptions
- Successfully installed Ubuntu Linux 18.04 LTS 64-bit on a bare-metal machine or VM instance
PostGres 10 (10.5 at time of my installation) is used as the persistence layer for TeamCity and for Bitbucket in this configuration. Although both application offer alternatives for the database, the use of PostGres would facilitate easire migration to a team development environment supporting regular backups and recovery positions.
- Logon to your Ubuntu instance and start a terminal. The shortcut for this is Ctrl+Alt+T. The first use of sudo will require you to enter your login credentials again (until timeout).
sudo apt-get update
sudo apt-get upgrade -y
sudo apt-get install postgresql postgresql-contrib- Once the installation is complete, we need to create an account for Bitbucket and also TeamCity. I created two roles, bbucket and teamcity. For simplicity, I gave my roles the Superuser attribute although it's not necessary. Start the PostGres prompt with:
sudo -i -u postgres- Then create the user and set the password (press enter after each line).
createuser --interactive
Enter the name of the roles to add: bbucket
Shall the new role be a superuser? (y/n) y
createuser --interactive
Enter the name of the roles to add: teamcity
Shall the new role be a superuser? (y/n) y- When you've finished creating the user type the following commands to set the password and the required schema for Bitbucket and TeamCity. Replace chooseapassword with your preference:
psql
ALTER USER bbucket WITH PASSWORD 'chooseapassword';
ALTER USER teamcity WITH PASSWORD 'chooseapassword';
CREATE SCHEMA teamcity AUTHORIZATION teamcity;
\q
exit- Then add the corresponding Linux users against those roles that we can then use in the set-up of TeamCity and Bitbucket. When prompted to enter the new UNIX password, use the same password you chose earlier. I just pressed enter when prompted for the user details such as Full Name etc.
sudo adduser bbucket
sudo adduser teamcity- Create the actual databases for your applications to use:
sudo -u postgres createdb bbucket
sudo -u postgres createdb teamcity- Bitbucket and Teamcity require the ability for PostGres to communicate over TCP. There are a couple of options to make these changes, either directly from the command line using sed or using gedit. To use gedit:
sudo cp -b /etc/postgresql/10/main/postgresql.conf /etc/postgresql/10/main/postgresql.backup
sudo gedit /etc/postgresql/10/main/postgresql.conf- Search for this line:
#listen_addresses = 'localhost'- Remove the # and replace the localhost so the line now reads:
listen_addresses = '*'- Save and close the file.
sudo cp -b /etc/postgresql/10/main/pg_hba.conf /etc/postgresql/10/main/pg_hba.backup
sudo gedit /etc/postgresql/10/main/pg_hba.conf- Right at the end of the file, add the following line (replacing the 192.168.1.0 with the subnet for your LAN or adapter that is assigned to the VM or Linux machine):
host all all 192.168.0.0/24 md5- Save and close the file. Finally restart PostGres to apply the changes:
sudo service postgresql restartI installed Postgres, TeamCity and Bitbucket all on the same server (including the TeamCity agents) as my performance requirements for a build server at this stage, aren't that high. If you do use multiple servers, there are extra steps to take for PostGres configuration. The Atlassian reference directs you to the correct Postgres resources.
Installing Docker (on Linux)
Assumptions
- Successfully installed Ubuntu Linux 18.04 LTS 64-bit on a bare-metal machine or VM instance
- No earlier version of Docker has been installed on this instance of Linux (which requires removal prior)
On the same server as we've just deployed PostGres, we'll deploy Docker in readiness for the Teamcity builds and for Kubernetes to use sas the container engine. Rather than repeat word for word all the content on the Docker site, follow the instructions here for Xenial 16.04 and newer to install Docker CE.
Installing Bitbucket
Assumptions
- Successfully installed Ubuntu Linux 18.04 LTS 64-bit on a bare-metal machine or VM instance
- Successfully installed PostGres 10 or later and created the bbucket user and database as per the previous section
- Install Git if you haven't already (it's a dependancy for Bitbucket)
sudo apt-get install git- Visit Atlassian to download Bitbucket and select the Linux 64bit option. Save the file into your Downloads folder
- Open a Terminal (or use your previous one) and execute the following (assumes you've only got one Bitbucket file downloaded):
sudo chmod a+x ~/Downloads/*bitbucket*.bin
sudo ~/Downloads/*bitbucket*.bin- Select Install a new instance
- Select Install a Server instance
- Optionally change the installation folder
- Optionally change the repo folder
- I used the default HTTP port but you'll need to change it if you believe it's in use by something else
- Leave Install Bitbucket as a service checked
- Launch Bitbucket after install
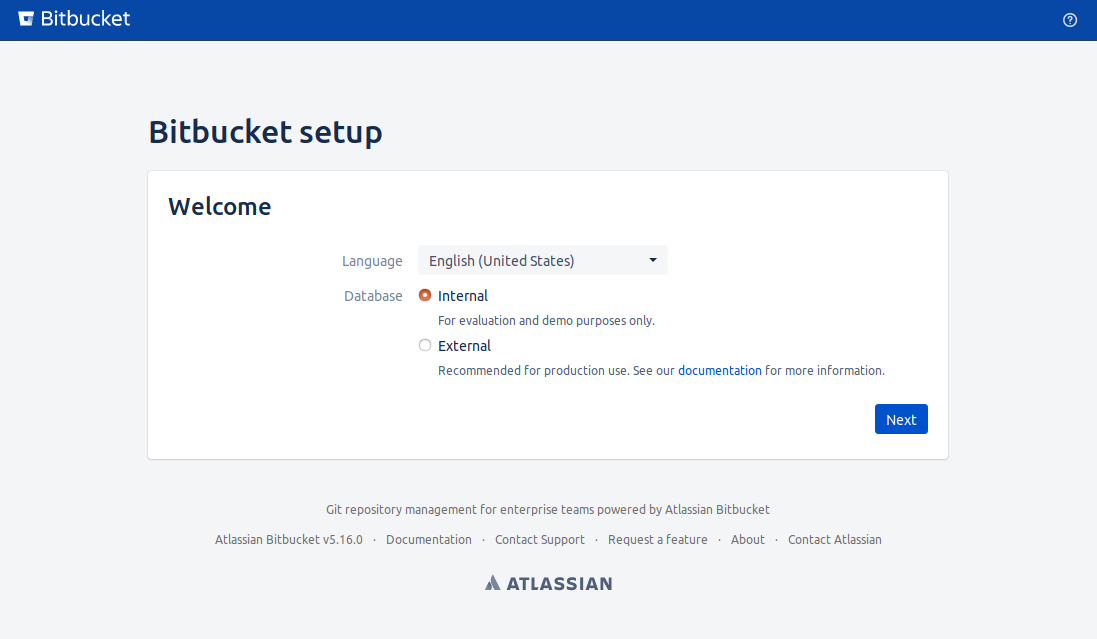
- You should now be able to access the Bitbucket Setup screen at http://localhost:7990 (or the alternative port if you chose one).
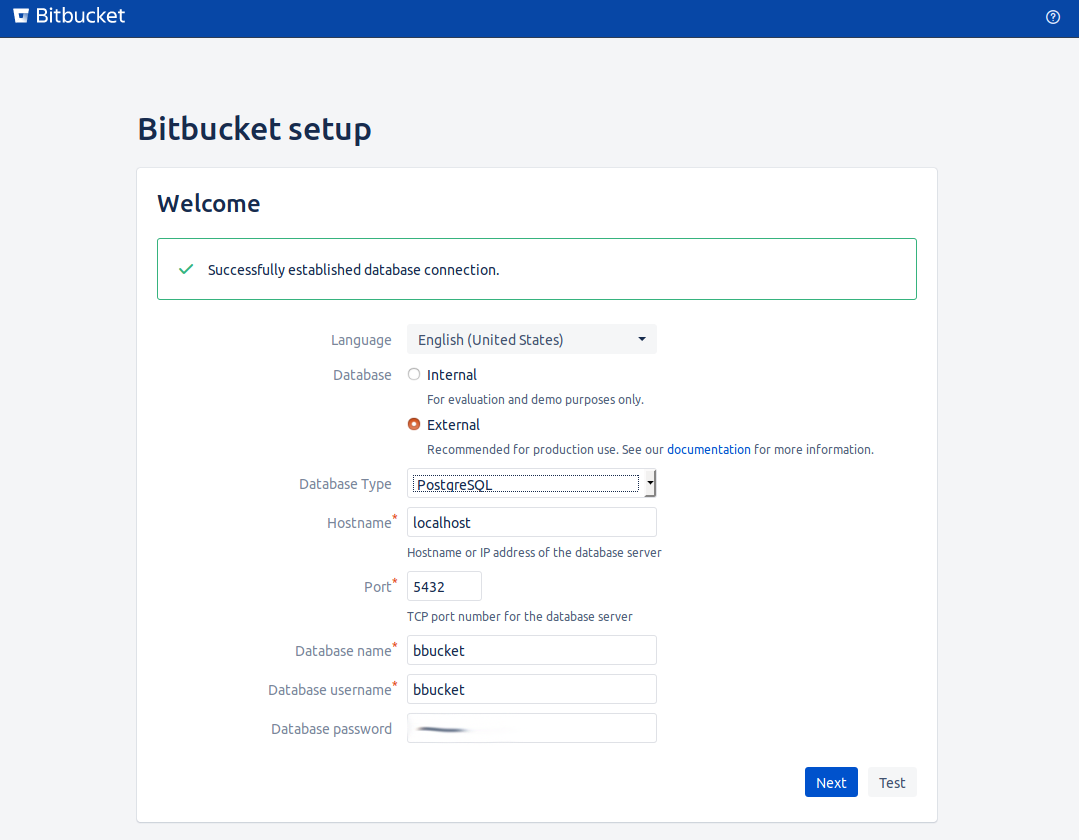
- Select External for the database
- Select PostgreSQL for the Database type
- Enter localhost for the Hostname
- Leave the default port
- Enter a Database name of bbucket
- Enter a Database username of bbucket
- Enter the password you chose earlier for the bbucket role
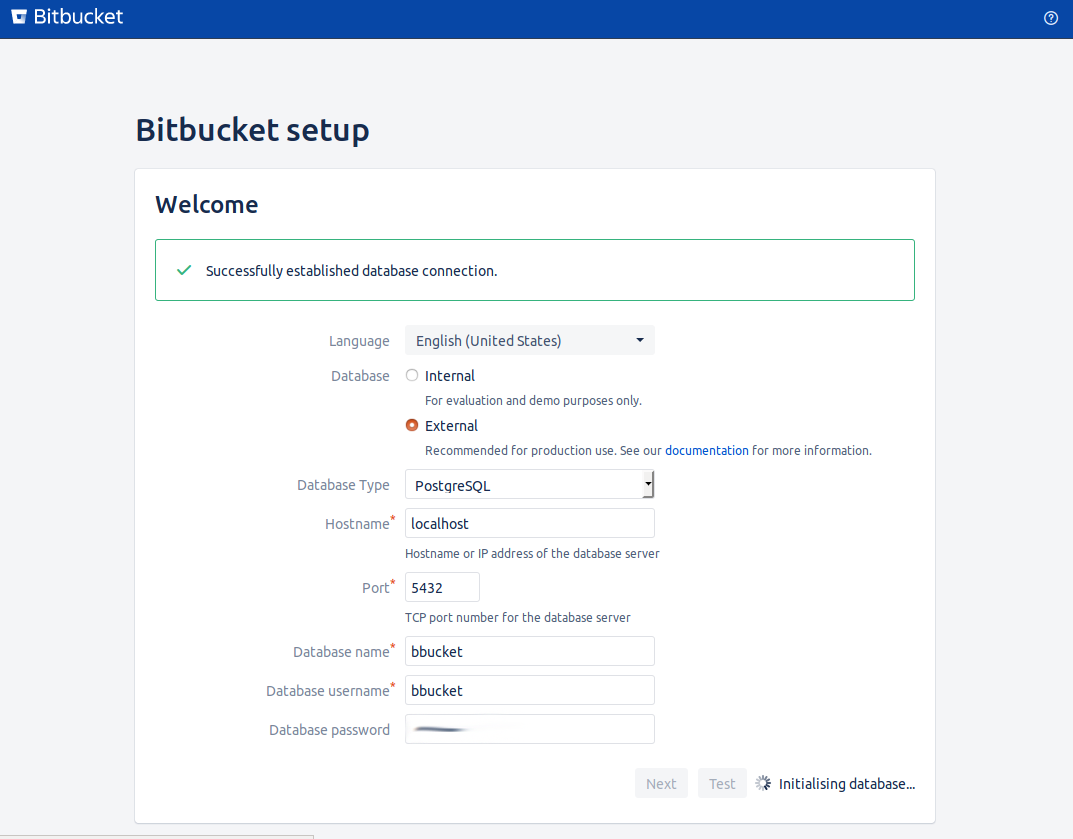
- Click Test and you should see a notification "Sucessfully established database connection".
- Click Next
- Save a copy of your Server ID
- Select I need an evaluation licence
At this stage you may or may not have an Atlassian account which you'll need to generate the trial key for your server (and later when the trial expires, register for the $10 licence to keep you running).
If you create the account directly from the setup page, the validate link will include your server ID
- Select Bitbucket (Server), enter an organisation name and generate a key. If you're performing this directly on the machine, Bitbucket will paste this directly into the key field.
- Click next to continue
Finally, create your Administrator account and Click go to Bitbucket and Login with your new Credentials. You should now see a Welcome to Bitbucket page!
Bitbucket Configuration Screenshots
Installing TeamCity
Assumptions
- Successfully installed Ubuntu Linux 18.04 LTS 64-bit on a bare-metal machine or VM instance
- Successfully installed PostGres 10 or later and created the teamcity user and database as per the previous section
- Successfully installed Bitbucket 5 (so that we can connect this TeamCity instance to the local Bitbucket repo
- Successfully installed Docker on the Linux machine for TeamCity to be able to build with
TeamCity has a dependancy on Java, so first check whether you have Java installed (8.x and then install if Java isn't found)
java -version
sudo apt install openjdk-8-jre
sudo apt install default-jre
Once Java is installed, you need to add the Java binary folder to your environment variables. To add the environment variable permanently in Ubuntu:
sudo gedit ~/.profileand paste in at the bottom of the file
# set JAVA_HOME so it points to the installed Java instance
if [ -d "/usr/bin/java" ] ; then
    JAVA_HOME="/usr/bin/java"
fi
followed by Save and Close. Because the permanent environment variable won't be picked up until restart, we'll add a session one now to keep progressing:
export JAVA_HOME="/usr/bin/java"- Because we're targeting .Net and .Net Core, download and install Mono and .Net Core for Ubuntu Linux. Strictly speaking Mono isn't required, but you may find it useful for later build processes as you can combine dotnet and msbuild should have a requirement to do so.
sudo apt-key adv --keyserver hkp://keyserver.ubuntu.com:80 --recv-keys 3FA7E0328081BFF6A14DA29AA6A19B38D3D831EF
echo "deb https://download.mono-project.com/repo/ubuntu stable-bionic main" | sudo tee /etc/apt/sources.list.d/mono-official-stable.list
sudo apt update
sudo apt-get install mono-complete

wget -q https://packages.microsoft.com/config/ubuntu/18.04/packages-microsoft-prod.deb
sudo dpkg -i packages-microsoft-prod.deb
sudo add-apt-repository universe
sudo apt-get install apt-transport-https
sudo apt-get update
sudo apt-get install dotnet-sdk-2.1- Download the Linux tar.gx TeamCity installation package and save in your Downloads folder.
- Unpack the archive to your home directory with a folder name TeamCity.
- Create a data directory for TeamCity in your home directory called .BuildServer (accessible at ~/.BuildServer
- Add permisions to allow Docker to be managed by TeamCity. The docker group grants privileges equivalent to the root user so only do this on an environment that has minimal exposure to the wider internet. Do this by following the Post Installation Steps at Docker.
- Launch TeamCity (assuming you've used the TeamCity folder to extract the binaries to) to continue the configuration with:
sudo ~/TeamCity/bin/runAll.sh start- Browse to http://localhost:8111 and you should be presented with a screen prompting you to select the Data directory. Enter the ~/.BuildServer folder you specified earlier. TeamCity will then prepare the directory.
- When prompted to select the database type, choose PostgreSQL and when prompted, download and install the JDBC driver if it's something you don't already have on your machine. TeamCity takes care of the installation for you.
- Set Database host{:port] to localhost:5432
- Set Database name: to teamcity
- Set User name: to teamcity
- Set Password: to the password you chose in the PostGres configuration step and click proceed.
- TeamCity will then initalize the server components and then you'll be presented with a Licence Agreement. Accept the Licence and press Continue (you may as well if you've come this far!)
- Now create your administrator account. I'll leave choice of username and password up to you.
- If all successful, you'll be presented with the My Settings and Tools page in TeamCity. If you want to enter an email address to receive notifications from TeamCity, go for it.
- Each time you reboot, you will need to start the TeamCity script, so let's set it up as a Service:
echo $USER
sudo gedit /etc/systemd/system/teamcity.service- Paste the following text into the open text file and save it. The service file needs an absolute path so swap out {your user name} with the user you just echo'd previously.
[Unit]
Description = teamcity daemon

[Service]
Type=forking
ExecStart=/bin/bash /home/{your user name}/TeamCity/bin/runAll.sh start
ExecStop=/bin/bash /home/{your user name}/TeamCity/bin/runAll.sh stop

[Install]
WantedBy = multi-user.target- Now enable the service with:
sudo systemctl daemon-reload
sudo systemctl enable teamcity
Now is a good time for a reboot! It will at least make sure everything is wired up correctly!
NB: If the portal doesn't open at http://localhost:8111, run the stop command below and look at the output in the terminal window. It should give you an indication whether you've missed a step like the Java installation or not defined the environment variable.
sudo ~/TeamCity/bin/runAll.sh stopNB: If in Nautilus (the Ubuntu file explorer) you can't see the a bunch of the folders you're working with, they're hidden. You can show hidden folders by changing the setting in the hamburger menu, top right.
NB: If you need to start and stop the TeamCity service for any reason, you can do this:
sudo systemctl stop teamcity
sudo systemctl start teamcity
TeamCity Configuration Screenshots
Pushing to Bitbucket, building with TeamCity and updating Docker registry
Assumptions
- Successfully installed Ubuntu Linux 18.04 LTS 64-bit on a bare-metal machine or VM instance
- Successfully installed Postgres 10 or later and created the teamcity user and database as per the previous section
- Successfully installed Bitbucket as per the prior section (so that we can connect our TeamCity instance to the local Bitbucket repo
- Successfully installed Team City as per the previous section (so that we can build the source)
- Successfully installed Docker on the Linux machine (so that we've got an image library to post our build to and alos build the container)
Now it's time to push the project into a Bitbucket repo, let TeamCity detect the change and build the container image for the local repository. We'll save Kubernetes and the remaining mesh and container management components for the next step as once the container is available in the local image reigstry then Kubernetes can create deployments etc. pretty easily after that.
Creating the Bitbucket Project (Linux Server)
- Browse to http://localhost:7990 and click Projects
- Click Create Project
- Enter Project name MyContainer
- Keep or change the Project key
- Click Create project
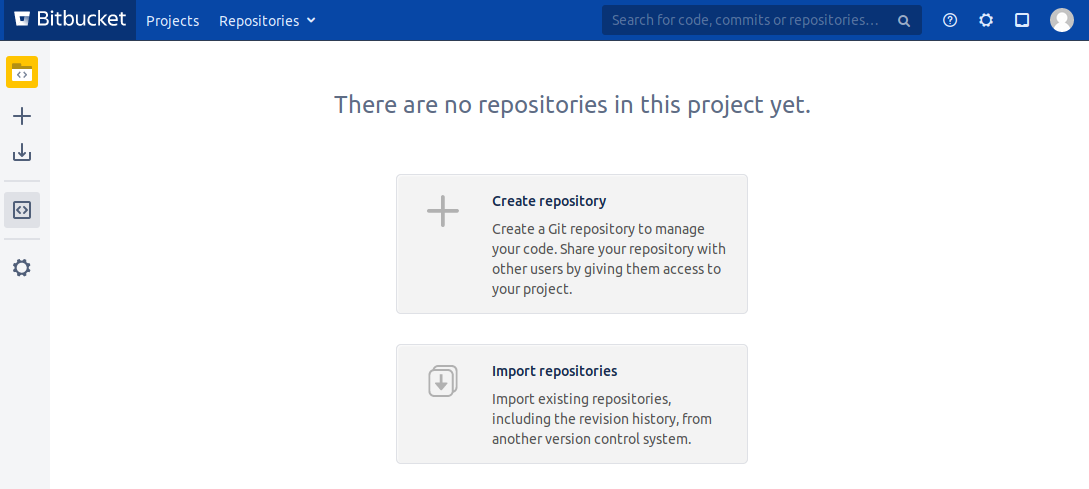
- On the Repositories page, click Create repository
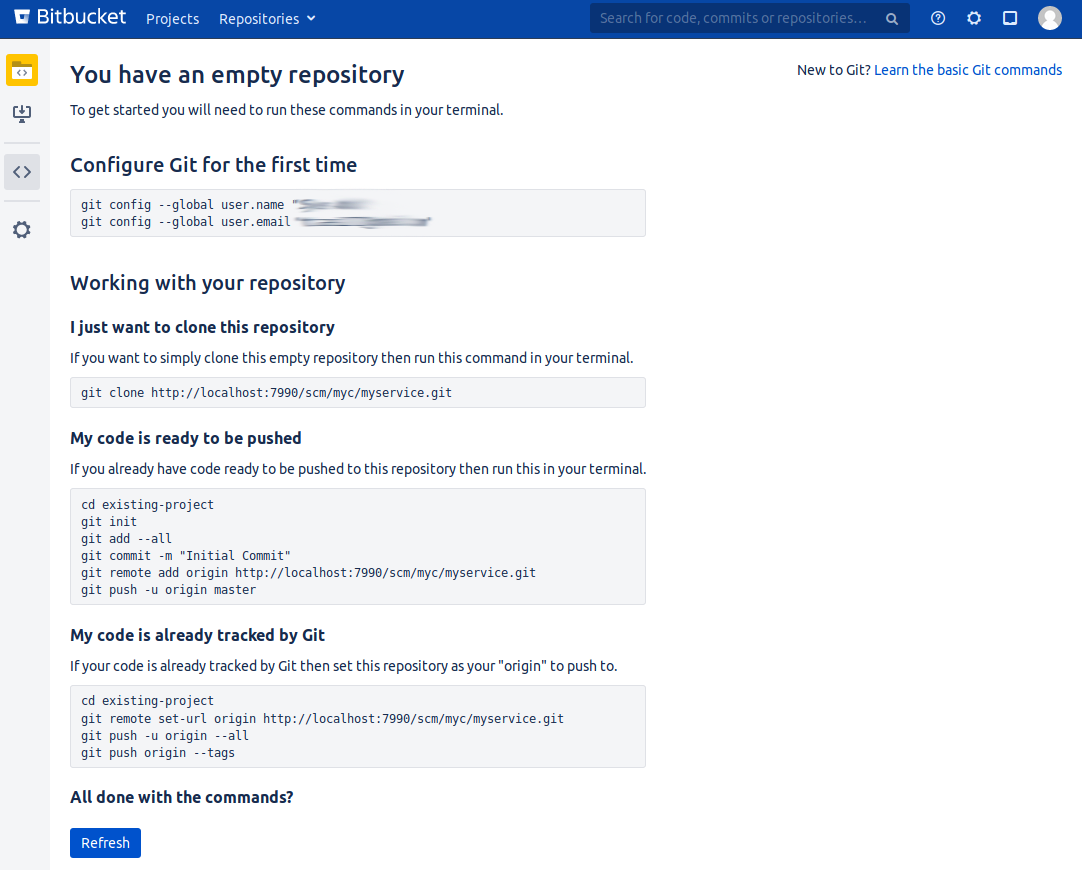
- Give the repo a name e.g. MyService. While you on this page, make a copy of the repo address as we'll use this for Visual Studio to post to the Repo http://localhost:7990/scm/myc/myservice.git
- Click Create repository
Pushing to the new Repo (Windows Development Machine)
- Open your MyService.InContainer solution and right-click on the solution name in the Solution Explorer. Click on Add Solution to Source Control. You may receive a message that some of the files in your solution are outside of Git Management, click OK.
- Click on Team Explorer and double-click on the Local Repository for MyService.InContainer.
- Click on Settings
- Click on Repository Settings
- Click on Sync
- Click on Publish Git Repo under Push to Remote Repository. When prompted for the URL paste the address for the repo we saved earlier swapping the localhost for the IP address of the Linux machine or VM you installed Bitbucket on.
- Click Publish
- You will then be prompted for credentials. We'll just use the admin credentials we created earlier but if you intend on rolling this out to your wider team, then create individual accounts so you can see who's pushing what changes.
You should now see in your Visual Studio output window, "Pushing master."
Create container build in TeamCity (Linux Machine)
- Back on the Linux machine, press F5 to refresh the repo page on Bitbucket. You should now see your source saved to the Bitbucket repo.
- Open your TeamCity instance on http://localhost:8111 and login with the admin username and password you created earlier.
- Click Create Project
- In Repository URL, paste the same repo URL you just used for Visual Studio
- Enter the username and password for the Bitbucket repo (which will be the same ones you just used for the Visual Studio push.
- You should now see your connection to the VCS repository is verified, click Proceed to continue.
- The first page you'll be presented with includes a bunch of Auto-Detected build steps. Ignore all of them by clicking on Build Steps in the left-hand menu. I found most were relying on the underlying OS being Windows and it was easier to start from scratch.
- Click on Add build step
- Change the Runner type to: NuGet Installer
- Click Show advanced options
- Click NuGet.exe Tool Configuration
- Click Install Tool and select NuGet.exe from the drop down list.
- Select version 4.8.1 (you may choose to use a later version), select Set as Default and Click Add. You should now have NuGet as an available tool. Close the browser tab that was opened.
- Press F5 to refresh the New Build Step page and reselect the NuGet Installer and Show Advanced Options again.
- Assign a Step Name such as NuGet Initial Drawdown
- The default NuGet.exe should be selected
- In the path to to the solution file, click on the Folder Heirarchy and select the MyService.InContainer.sln file from the atatched Bitbucket repo.
- Select the Update packages with the help of NuGet update command
- Click Save.
- Back on the Build Steps page, click on Run which will run this single step. The Agent Build page will automatically open and you should see the progress of the build.
- When the build has finished, click on Edit Configuration Settings and BuildStep: Nuget Installer
- Click Add build step
- Select *.NET CLI (dotnet)
- In Step Name: type dotnet build
- In Projects:, click on the Folder Heirarchy and select the MyService.InContainer.sln file from the attached Bitbucket repo.
- Click Save.
- Click Run.
- In the top navigation, expand Projects -> Myservice and click on Build to see the build running.
- You should see the two successful builds. To view the build log, click on the down icon beside Success in the top build. In here you can expand out the build results.
- Click on Edit Configuration Settings and then Build Steps
- Click Add build step
- Select Docker
- In Step name: enter Build Container Image
- Leave build selected for the Docker command
- In Path to file: click on the Folder Heirarchy and select the Dockerfile file from the attached Bitbucket repo. This is the advantage of adding the ContainerFiles project and constructing the solution folder as per the earlier steps. No changes here, just point to the file in the repo and you can build both locally and here in the TeamCity instance.
- In the Image name:tag enter myservice (it must be all lowercase)
- Click Save.
- Click Run.
The default for the TeamCity project is to build on a successful check-in to your source control. You can change this under Edit Configuration Settings and Triggers, but we'll leave it for now.
If you want to check that Docker successfully has the image in it's local repository, run the following command in a terminal window:
sudo docker image lsYou should see your myservice image listed along with the dotnet alpine images that will have been pulled during the first build. The subsequent builds will be much faster as it won't be pulling those images down.
Bitbucket and TeamCity Project Configuration Screenshots
Installing Kubernetes
Assumptions
- Successfully installed Ubuntu Linux 18.04 LTS 64-bit on a bare-metal machine or VM instance
We're finally at the point where we will install Kubernetes and prepare this for running a Pod of our dotnet containers protected by a Project Calico CNI and an Istio proxy.
- Add the signing key for the Kubernetes install:
sudo curl -s https://packages.cloud.google.com/apt/doc/apt-key.gpg | sudo apt-key add -- Create a Kubernetes list file:
sudo gedit /etc/apt/sources.list.d/kubernetes.list- Paste the following line into the file and save it:
deb http://apt.kubernetes.io/ kubernetes-xenial main- Update the app registry and then install Kubernetes
sudo apt-get update
sudo apt-get install -y kubelet kubeadm kubectl kubernetes-cni- Check to see if your swap file is enabled. The next step will fail if you have a swap file enabled.
sudo cat /proc/swaps- To disable all swap files if enabled:
sudo swapoff -a- Run the following to permanently remove the swap files. Comment any swapfile lines by inserting a hash at the front. Save the file and reboot before continuing:
sudo gedit /etc/fstab- The next step is to initialise the Kubernetes cluster as the master. The important point here is in the --pod-network-cidr address range. Pick a private IP address range that is not your base machine private network range.
sudo kubeadm init --pod-network-cidr=172.16.0.0/12 --apiserver-advertise-address 0.0.0.0NB: Be careful on the IP address range that you assign to the pod network. When I was first mucking around with the Kubernetes installation, I assigned a network range exactly the same as my LAN. Everything was fine and dandy until I got to the stage of configuring a service policy via Istio to route traffic from the external load-balanced IP address on my LAN to the Pod which also happened to have the same LAN address. An unmanaged load-balanced egress service from Kubernetes worked fine however, further muddying the waters.
In short if your network address range is 192.168.0.0, and you don't think you'll be using a pods containing more than 254+ containers then 192.168.1.0/24 is fine, otherwise use one of the bigger private subnets such as 172.16.0.0/12.
NB: Breaking Change You may see when attempting to perform the init command, that the latest Docker vsion is unsupported. You have two options. Either retrograde your Docker version to 18.03 or ignore the error and continue. For the purposes of this implementation, I ignored the error at version Docker 18.09.
sudo kubeadm init --pod-network-cidr=172.16.0.0/12 --apiserver-advertise-address 0.0.0.0 --ignore-preflight-errors=all- After executing the Kubernetes administration init command, you will be presented with a large amount of text in your terminal window. Take a note of the join token which will be output near the end of the text block
[init] using Kubernetes version: v1.11.3
[preflight] running pre-flight checks
I0926 15:49:49.147970   17180 kernel_validator.go:81] Validating kernel version
I0926 15:49:49.148085   17180 kernel_validator.go:96] Validating kernel config

---- you'll see more content here ----

You can now join any number of machines by running the following on each node
as root:

kubeadm join n.n.n.n:6443 --token fdd77g.he5npt3cn5frg912 --discovery-token-ca-cert-hash sha256:a79983bc518675e451b04e1dbdd39a7a9f5b18c58a67434160f047b14df8deda- To finish the configuration, run the following commands (which you will see replicated in your terminal window):
mkdir -p $HOME/.kube
sudo cp -i /etc/kubernetes/admin.conf $HOME/.kube/config
sudo chown $(id -u):$(id -g) $HOME/.kube/config- Because we're running a single machine cluster, we will need to 'untaint' the cluster to allow pods to be run on this server. It's a mechanism deployed by Kubernetes to ensure there are enough resources assigned and each server has it's own role to play (which of course, we're ignoring). Run the following command:
kubectl taint nodes --all node-role.kubernetes.io/master-- To check to see if Kubernetes is up and running, you can quickly query the status of all pods in all namespaces:
kubectl get pods --all-namespaces- It's worthwhile downloading the Kubernetes Dashboard as you can quickly check status of Pods and Containers, but just as usefully, you can quickly attach to the shell of a Container and check the Container logs. Run this to download and deploy the dashboard Container image
kubectl apply -f https://raw.githubusercontent.com/kubernetes/dashboard/master/src/deploy/recommended/kubernetes-dashboard.yaml- Below is the command to launch the proxy dashboard, but wait until both Project Calico is installed and the Creating a Kubernetes Deployment section as there is a bunch of other detail that is useful to know alongside just launching it. It's also worthwhile lauching this in it's own terminal, so Ctrl+Alt+T or Ctrl+Shift+T to open in a terminal window tab.
kubectl proxyWe'll finish a couple of other components related to Kubernetes and then we'll come back to use the dashboard.
Installing Project Calico
Assumptions
- Successfully installed Ubuntu Linux 18.04 LTS 64-bit on a bare-metal machine or VM instance
- Successfully installed Kubernetes as per the previous section
Kubernetes provides many options for container networking, expanding the Infrastructure as Code concept. I chose Project Calico as it's being used for some fairly significant cloud offerings such as Github and also workds with OpenStack among other frameworks. Although we won't be setting up any policies here, Project Calico also allows for some robust ingress and egress control in conjunction with Istio. Because Project Calico provides the Container Network Interface, Project Calico deals with policy at Layers 3 and 4 of the OSI model (in Kernel) and Istio deals with policy at Layer 7 (in Userspace).
For this section we'll return to the importance of your --pod-network-cidr selction. If you chose to run with what I posted in the earlier section, you will need to download the calico.yaml file and modify separately before you apply it to the infrastructure. I'll follow that approach now
curl -f https://docs.projectcalico.org/v3.3/getting-started/kubernetes/installation/hosted/kubernetes-datastore/calico-networking/1.7/calico.yaml > ~/.kube/calico.yaml
gedit ~/.kube/calico.yaml- Search in the file for CALICO_IPV4POOL_CIDR and change the associated value to the --pod-network-cidr value used earlier, in the example 172.16.0.0/12. Save and close the file. Run the following two commands:
kubectl apply -f https://docs.projectcalico.org/v3.3/getting-started/kubernetes/installation/hosted/rbac-kdd.yaml
kubectl apply -f ~/.kube/calico.yaml
The configuration by default is scaled for ~50 container nodes using what is in this case, a deployed etcd datastore. You can modify the downloaded yaml file to support many more nodes if your build needs to be able to cope with it, the instructions are at Project Calico here.
If Calico has been deployed correctly, you should see both the CoreDNS pods in the running state:
kube-system      coredns-522ddf47a7-jlsbg                 1/1     Running     2          17d
kube-system      coredns-522ddf47a7-kmhmp                 1/1     Running     2          17d
Don't proceed to the next steps until those containers are up and running. To remove those configurations and try again after re-editing networking configuration, you can perform:
kubectl delete -f ~/.kube/calico.yaml
kubectl delete -f https://docs.projectcalico.org/v3.3/getting-started/kubernetes/installation/hosted/rbac-kdd.yaml
Should you wish to choose an alternative, they are listed here on the Kubernetes configuration site.
Installing MetalLB
Assumptions
- Successfully installed Ubuntu Linux 18.04 LTS 64-bit on a bare-metal machine or VM instance
- Successfully installed Kubernetes as per the prior section
- Successfully installed Project Calico as per the previous section
Because we're installing Kubernetes onto a local VM or bare-metal machine, we need to install a compatable Load Balancer if we want to use something other than NodePort to allow ingress into your Kubernetes cluster. If you think about the origins of Kubernetes, being born out of the Borg platform for Googles own container management platform, it's understandable that the default is to use connecting logic for cloud IaaS.
MetalLB fits the need nicely. If you prefer NGINX, you can also configure that as a bare-metal load balancer for Kubernetes with instructions on load-balancer configuration from NGINX here.
- Installation is pretty straight forward, run the following in a terminal:
kubectl apply -f https://raw.githubusercontent.com/google/metallb/v0.7.3/manifests/metallb.yamlThere are two options for configuration, either the Border Gateway Protocol (BGP) or a simple Layer 2 configuration. We'll configure for the latter as you may not be deploying into an environment that has a BGP capable router.
NB: Because MetalLB will be making IP assignments on your local network, you need to be deploying into an address space you know is free. In my case, I have my DHCP configured to assign addresses between n.n.n.10 and n.n.n.190 with the lower range and the upper range I use for static addressing for certain devices on my network. If you're an IoT nut, you 'may' need a bigger range of addressing but your IoT gear really should be on a separate VLAN at a minimum, if not firewalled through a separate router.
- Open the text editor:
gedit ~/.kube/metal_lb_l2_cfg.yaml- Paste following text in below, changing the n values into an available address range on your local LAN from your router and click save.
apiVersion: v1
kind: ConfigMap
metadata:
  namespace: metallb-system
  name: config
data:
  config: |
    address-pools:
    - name: default
      protocol: layer2
      addresses:
- 192.168.n.n-192.168.n.n- Apply the configuration:
sudo kubectl apply -f ~/.kube/metal_lb_l2_cfg.yaml- On successful application of the configuration, you should see a couple more pods runnning in the metallb-system namespace:
kubectl get pods -n metallb-system

controller-765568787-d4wi8               1/1     Running     1          17d
speaker-7fr9x                            1/1     Running     1          17d
If you want to push this configuration further, you can create your own custom switch using OpenSwitch and FRRouting to build a BGP capable router. A good summary of the various open source routing technologies is available here.
Installing Istio
Assumptions
- Successfully installed Ubuntu Linux 18.04 LTS 64-bit on a bare-metal machine or VM instance
- Successfully installed Kubernetes as per the prior section
- Successfully installed Project Calico as per the prior section
- Successfully installed MetalLB as per the previous section
The last installation step is setting up Istio as our L7 proxy to manage our Load Balancer configuration.
- Download and unpack Istio. The latest version at time of writing is 1.0.4. I am deliberately renaming the unpacked folder to 'istio' after downloading so all the subsequent commands are consistent without changing the scripts with a version number. You will need to update the mv command below for the version number you download.
cd ~/
curl -L https://git.io/getLatestIstio | sh -
mv ~/istio-1.0.4 ~/istio- Apply the Istio resource definitions with the following:
kubectl apply -f ~/istio/install/kubernetes/helm/istio/templates/crds.yaml- Although the Istio Kubernetes guide recommends Helm for the next step, I've found Helm to be a work in progress and I had more success following the Step 2 instructions. We're installing here with TLS enabled as this is a clean installation.
kubectl apply -f ~/istio/install/kubernetes/istio-demo-auth.yaml- The final step is to enable the Istio sidecar for the namespaces we will be deploying containers into. For this exercise, labeling the default will be sufficient. The sidecar is another container image that gets automatically injected when you create a deployment of your own containers in Kubernetes. It takes responsibility for managing the traffic as is routed to the Pod.
kubectl label namespace default istio-injection=enabledA useful check that we have everything wired up prior to heading into the next stage, is to run the following command:
kubectl get pods -n istio-systemIf Istio and MetalLB are properly configured, the istio-ingressgateway should be assigned an External IP address (take a note of this as you will need it later for testing). If there is an issue with the configuration, it will remain in the Pending state.
Wait until all the Istio pods are showing as Running or Completed before heading into the next section.
Creating a Kubernetes Deployment, Configuring Istio and Updating Pod Containers on Git Push
Assumptions
- Successfully installed Ubuntu Linux 18.04 LTS 64-bit on a bare-metal machine or VM instance
- Successfully installed Kubernetes as per the prior section
- Successfully installed Project Calico as per the prior section
- Successfully installed MetalLB as per the prior section
- Successfully installed Istio as per the previous section
- Successfully installed TeamCity and Bitbucket as per the prior section
- Pushed your source code to Bitbucket and TeamCity was able to build and deploy the docker container image
In this section we'll pull all of the various threads together to push the builds to the Kubernetes cluster and have them update when we make a push to our Git repo.
NB: Throughout this section, I will use configuration files saved to the ~/.kube directory to be applied with kubectl. I find that much easier than apply at the command line and will later be useful for performing an infrastructure CI/CD process.
Get the Kubernetes Dashboard running (Linux Machine)
By default, the Kubernetes Dashboard will throw a pile of exceptions due to permissions if you login with a session token. These steps will update your configuration file and give it permissions to let you log in to the Kubernetes dashboard.
- Get the cluster token:
export TOKEN=$(kubectl -n kube-system describe secret default| awk '$1=="token:"{print $2}')- Assign it to the configuration file (which you created earlier after the Kubernetes intialisation step)
kubectl config set-credentials kubernetes-admin --token="${TOKEN}"- Grant the cluster role permission to access the dashboard. Launch the text editor:
gedit ~/.kube/dashboard-access.yaml- Paste the yaml below, save and exit:
apiVersion: rbac.authorization.k8s.io/v1beta1
kind: ClusterRoleBinding
metadata:
  name: default
  labels:
    k8s-app: default
roleRef:
  apiGroup: rbac.authorization.k8s.io
  kind: ClusterRole
  name: cluster-admin
subjects:
- kind: ServiceAccount
  name: default
namespace: kube-system- Apply configuration to the kubernetes cluster:
kubectl apply -f ~/.kube/dashboard-access.yaml- You can now launch your Kubernetes dashboard and login (In a new terminal tab, Ctrl+Alt+T):
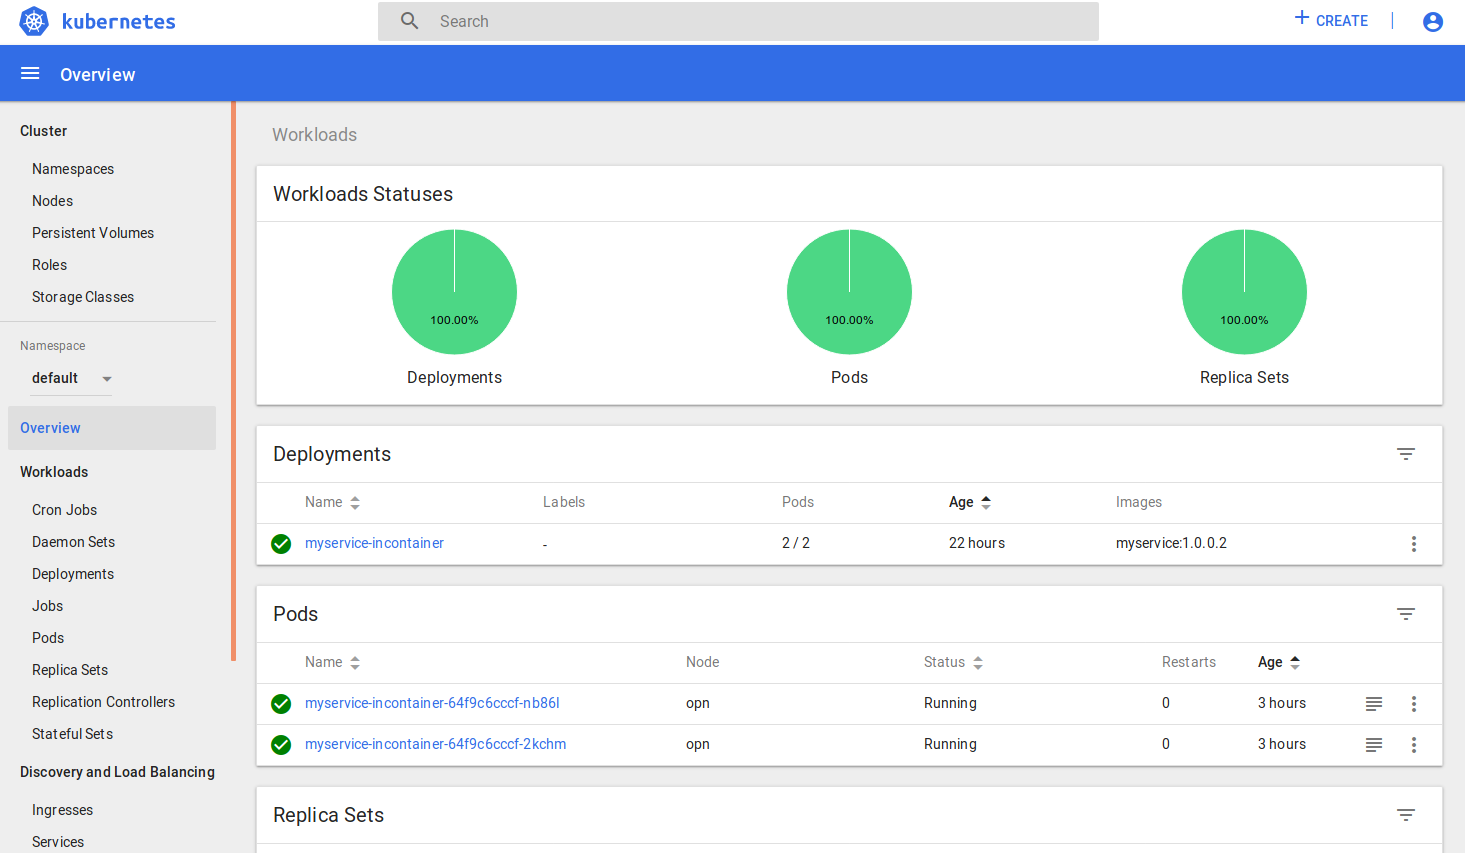
kubectl proxy- Navigate to http://localhost:8001/api/v1/namespaces/kube-system/services/https:kubernetes-dashboard:/proxy/#!/login and click on the ellipsis. Select the config file in the ~/.kube folder and click sign-in. You should be presented with an Overview page of your workloads in the default namespace.
Creating a Kubernetes Deployment (Linux Machine)
A deployment for Kubernetes is a wrapper for the Pods and ReplicaSets. You specify what containers are deployed (some might get injected like Istio sidecars), how many are instantiated and your preferred update process.
- Create a new deployment file:
gedit ~/.kube/mycontainer-deployment.yaml- Paste the following into the file, save and close.
apiVersion: apps/v1
kind: Deployment
metadata:
  name: myservice-incontainer
spec:
  replicas: 2
  selector:
    matchLabels:
      app: myservice
  template:
    metadata:
      labels:
        app: myservice
        environment: myservice-development
    spec:
      containers:
        - name: myservice-incontainer
          image: myservice
          imagePullPolicy: Never
          resources:
            limits:
              memory: "100Mi"
            requests:
              memory: "10Mi"
          volumeMounts:
            - name: dev-net-tun
              mountPath: /dev/net/tun
              readOnly: true
          ports:
            - containerPort: 31380
          securityContext:
            capabilities:
              add:
                - NET_ADMIN
      dnsPolicy: "ClusterFirstWithHostNet"
      dnsConfig:
        nameservers:
          - 1.1.1.1
          - 9.9.9.9
        searches:
          - ns1.svc.cluster.local
        options:
          - name: ndots
            value: "2"
          - name: edns0
      volumes:
        - name: dev-net-tun
emptyDir: {}- Apply the deployment to the cluster:
kubectl apply -f ~/.kube/mycontainer-deployment.yamlNB: A few points on the deployment configuration file:
- replicas: How many instances of your containers you want Kubernetes to manage for you and keep alive.
- imagePullPolicy: Setting this to Never means that it's not going to run off to the Docker public repo and pull an image for this deployment only. We set to Never as this deployment is about injecting your own developed images into the local cluster.
- volumeMounts: Not explicitly required for this, but the configuration here will allow the container to make VPN connections directly from the container.
- securityContext: Same as volumeMounts.
- nameservers: You can change the name servers to use what ever preference you prefer.
After a sucessful deployment, in the dashboard, you should see in the Overview of the default namespace, 2 pods up and running. Also:
kubectl get pods -n defaultClick on the one of the Pods and scroll down to the Containers section. Here is a good example of a Pod of Containers where you 'll see the myservice-incontainer image and the side-loaded istio proxy image. You can also see two useful commands in the top banner, Exec and Logs. Exec launches a browser based terminal and Logs diplays any container log output.
Creating an Istio Gateway and Service (Load Balanced Ingress)
This step creates uses Istio to define a policy that let's external traffic communicate with your internal containers.
- Create a gateway configuration file:
gedit ~/.kube/istio-gateway.yaml- Paste the following into the file, save and close. The hosts: section is important. In the gateway configuration below, we are using the wildcard option for hosts which you can only have one of.
apiVersion: networking.istio.io/v1alpha3
kind: Gateway
metadata:
  name: myservice-gateway
spec:
  selector:
    istio: ingressgateway # use Istio default gateway implementation
  servers:
    - port:
        number: 80
        name: http
        protocol: HTTP
      hosts:
- "*"- Apply the configuration to Kubernetes:
kubectl apply -f ~/.kube/istio-gateway.yaml- Create a Service for your Container Deployment. This will give the Istio mesh something to route to.
gedit ~/.kube/myservice-service.yaml- Paste the following into the file, save and close. The important section in here is the selector, which is a key value pair assigned to the deployment. In the Deployment file we created a selector with a matchLabel. These match labels are how you link different configuration components together.
apiVersion: v1
kind: Service
metadata:
  name: myservice-service
  labels:
    run: myservice-service
spec:
  ports:
  - name: http
    port: 80
    protocol: TCP
  selector:
app: myservice- Apply the configuration to Kubernetes:
kubectl apply -f ~/.kube/myservice-service.yaml- Create an Istio route configuration file:
gedit ~/.kube/istio-route.yaml- Paste the following text in, save and close. The host should match the name in the myservice-service.yaml file. The gateway should match the gateway name:
apiVersion: networking.istio.io/v1alpha3
kind: VirtualService
metadata:
  name: myservice-virtualservice
spec:
  hosts:
  - myservice-service
  gateways:
  - myservice-gateway
  http:
  - match:
    - port: 80
    route:
    - destination:
        host: myservice-service
        subset: v1
---
apiVersion: networking.istio.io/v1alpha3
kind: DestinationRule
metadata:
  name: myservice-destination
spec:
  host: myservice-service
  trafficPolicy:
    loadBalancer:
      simple: LEAST_CONN
  subsets:
  - name: v1
    labels:
app: myservice- Apply the configuration:
kubectl apply -f ~/.kube/istio-route.yaml- Time to test the configuration and whether everything is working! In the terminal, run:
curl -f -HHost:myservice-service.default.svc.cluster.local "http://{the ip address of your cluster}"and you should see the response of your web page returning the service page from outside the Kubernetes cluster.
NB: Debugging tips:
- Using the Kubernetes dashboard, change the namespace to istio-system, click on Pods in the left-hand menu and click the istio-ingressgateway Pod link. Click on Exec in the top nav and execute an nslookup myservice-service.default to confirm that the service configuration registered the name. You can also perform a curl -f http://myservice-service.default and it should return the page content. If this is working, you know your containers are running, DNS is wired up, you have your service working and you just have to work on your Istio Gateway, Service and Destination Rules to get things up and running.
- To visualise in Firefox (you can use a Chrome addon as well), install the Firefox addon simple-modify-headers and configure the hostheader the same was a you did for curl. Alternatively from your windows development machine, you could add a hostheader to your hosts file OR most appropriately, update your DNS entries.
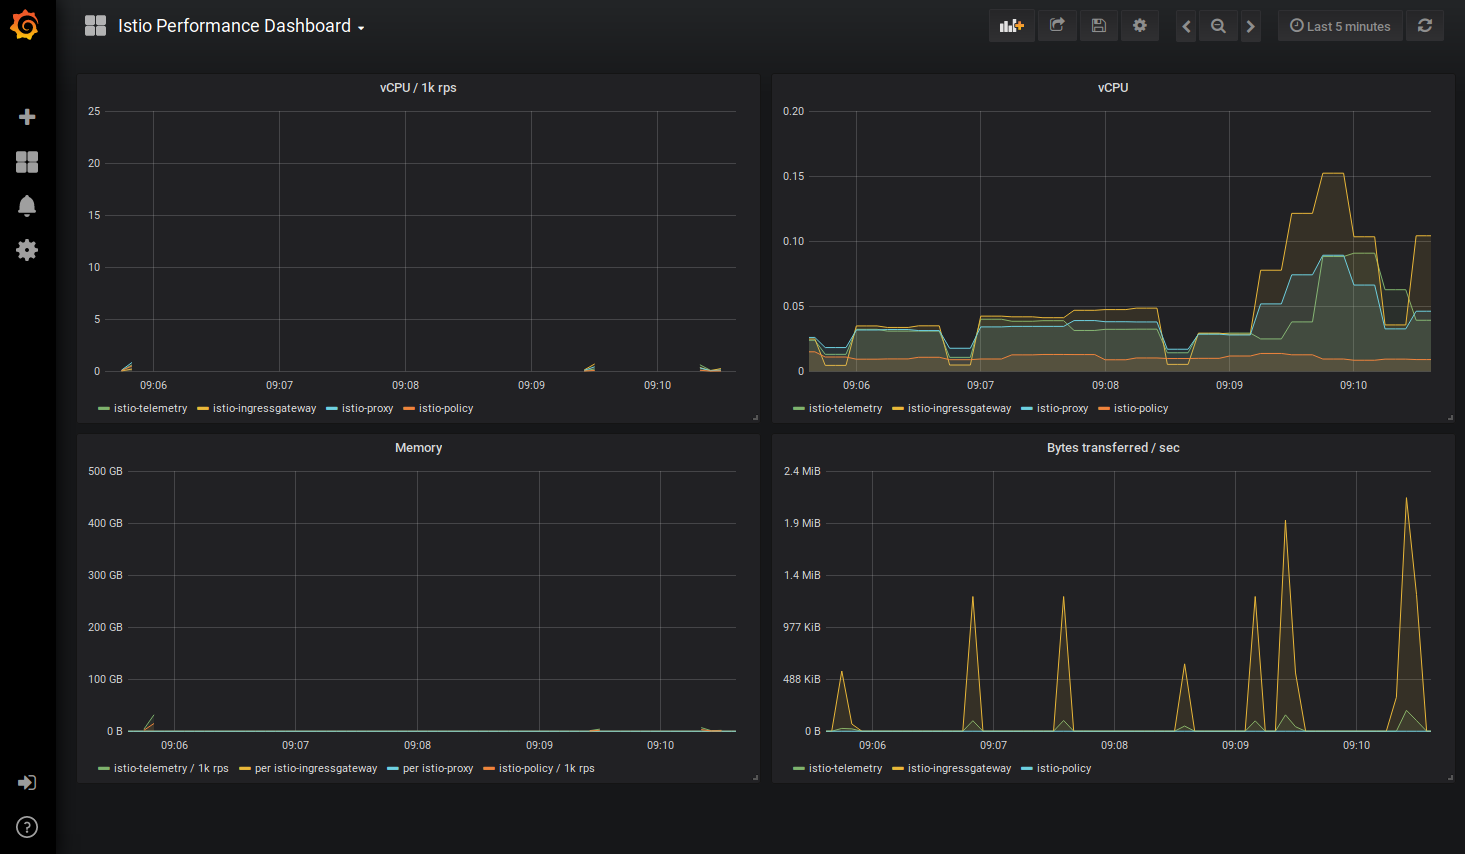
Dashboards and analysis at your disposal
Modifying the TeamCity build to refresh the Pod the dirty way (Linux machine)
Because we didn't specify a version number, we can use the default behaviour of a Kubernetes deployment to restore a Pod to the most recent version of the image stored in the local repository.
- Open the Teamcity console at http://localhost:8111
- Click on Projects in the top navigation, then Build under Myservice
- Click on Edit configuration settings
- Click on Build Steps then Add build step
- Select a Runner type of Command line
- Set Step name: Refresh Kubernetes Pods
- Change Run: to Custom script
- Paste the below into the custom script, replacing the {username} bit with your username as per the environment variable $USER. We need to reference the tokenised config file because we're effectively working with the kubernetes commands from a remote machine in this respect and this will authenticate us.
#!/bin/bash
kubectl delete pods -l app=myservice -n default --kubeconfig="/home/{your username}/.kube/config"- Click Save and then Run the build to confirm the build step is not causing errors.
If you want to observe the result of running this, go to the Kubernetes dashboard and change to the default namespace. Click on Pods in the left-hand menu and you should see an Age value of only seconds or minutes (depending on how long you took before going to look). Alternatively:
kubectl get pods -n defaultModifying the TeamCity build to refresh the Pod the clean way (Linux machine)
The more formal way would be to assign versions on the image builds in Docker and then have Kubernetes upgrade the Deployment. The advantage of this is you can run multiple versions at once using Canaries in combination with Istio. This lets you specify whether you have a percentage of instances running a certain version of your container while the remainder is running other versions. Versioning lets you roll back to previous builds quickly.
To do so, we'll use the package version we assigned in Visual Studio and update the build configuration to take advantage of it.
- Open the Teamcity console at http://localhost:8111
- Click on Projects in the top navigation, then Build under Myservice
- Click on Edit configuration settings
- Click on Build Steps then Add build step
- Make sure Working directory: is empty
- Select a Runner type of Command line
- Set the Run: to Custom script and paste the below into the Custom script field:
#!/bin/bash
VERSIONNAME=$(cat current.version)
echo "##teamcity[setParameter name='env.MS_PROJECT_VERSION' value='$VERSIONNAME']"
What we're doing here is using the version file we dumped out of the build process into the root directory to set an environment variable in the build which we can then use in later steps. You can optionally add this as a permanent variable which you can populate under the Parameters second on the left-hand menu and adding an Environment variable type using the name above, MS_PROJECT_VERSION.
- Click on Re-order build steps and drag the new Import Version Number step to position 2
- Click Add build step and select a Runner type: of Command Line
- Enter a Step name: of Refresh Kubernetes Versioned Pods
- In the Run: value select Custom Script and paste in the following replacing the username with your username as per the environment variable $USER.
#!/bin/bash
kubectl set image deployment.v1.apps/myservice-incontainer myservice-incontainer=myservice:%env.MS_PROJECT_VERSION% --kubeconfig="/home/{your username}/.kube/config"- Click Save.
- Finally, we'll update the Docker build step to tag the image with the version number. Click Edit on Docker build step we created earlier (should be step 4).
- Change the Image name:tab so that it now reads:
myservice:%env.MS_PROJECT_VERSION%- Click Save and then Run the build to make sure there are no errors.
NB: If you're creating Docker images in this fashion it will begin to fill up the local repository with older images. You can either add build steps to clean out older images or periodically perform the clean out action manually.
Updating the container image in the pod (Windows Development Machine)
When you performed your curl or viewed the page in the browser, hopefully you would have seen the version number we added to the page which we will now increment to demonstrate a change in the live container.
- Return to the Windows Development Machine and increment the project version number. Right click on MyService.InContainer, click Properties, Package and increment the value in Package version. Press F6 to build (which also happens to update the current.version file).
- Right-click on your Solution and click Commit...
- Enter something like "Changed version number" in you version comments and then Commit All.
- Click on Sync to Push your outgoing commit to the Bitbucket repository
Finally (Linux Machine)
- Once the sync successfully pushed to the master, you can switch back to the Linux machine and the TeamCity server http://localhost:8111/viewType.html?buildTypeId=Myservice_Build and wait for the Pending Build to start.
If you want to observe the result of running this, go to the Kubernetes dashboard and change to the default namespace. Click on Pods in the left-hand menu and you should see an Age value of only seconds or minutes (depending on how long you took before going to look). Or:
kubectl get pods -n defaultYou can also either load the page in the browser again or run the curl script below to view the results of the API change in the page output.
curl -s -HHost:myservice-service.default.svc.cluster.local "http://{your cluster ip address/"Bonus Round: Nuget Package to TeamCity for shared libraries in a Microservice Pool
Assumptions
- Successfully installed Ubuntu Linux 18.04 LTS 64-bit on a bare-metal machine or VM instance
- Successfully installed Kubernetes as per the prior section
- Successfully installed Project Calico as per the prior section
- Successfully installed MetalLB as per the prior section
- Successfully installed Istio as per the previous section
- Successfully installed TeamCity and Bitbucket as per the prior section
- Pushed your source code to Bitbucket and TeamCity was able to build and deploy the docker container image
If you got good seperation of concerns with your microservices, there are still good reasons for having some common code shared between them (see .Net + Kubernetes Lessons) such as common types or some utility classes. In the same way you might create a private PyPI server for Python code or use Maven with TeamCity and Java, you can use a TeamCity's ability to publish a NuGet feed to share code between your microservices.
New Bitbucket Repo (Linux Machine)
- Create a new repository for the shared libary by browsing to http://localhost:7990/projects/ and selecting MyContainer which was created earlier.
- Click on the Plus symbol in the left hand menu to create a new Repository
- Enter a name MyLibrary and taking a note of the repostory URL http://localhost:7990/scm/myc/mylibrary.git, click Create repository
New Shared Library (Windows Development Machine
Keeping a lot of the instructions fairly brief as we covered them earlier in the post...
- Create new .Net Standard class library by clicking on File, new Project. I named it MyLibrary.InContainer and left Create Git Repo checked.
- I renamed Class1.cs to Helpers.cs and in Helpers.cs, I pasted the following, but you can paste whatever you like as long as it compiles...
public class Helpers
{
    public string Foo()
    {
        return "bar";
    }
}- I commited the solution to the local repo. and then clicked Sync.
- I pushed to a Remote Repository but entering the new Bitbucket repo URL
http://{IP address of your bit bucket server:7990/scm/myc/mylibrary.git- I quickly switched back to the Bitbucket site to confirm the source code had been published.
TeamCity Configuration (Linux Machine)
- In the TeamCity Administration view http://localhost:8111/admin/admin.html?item=projects, click on Create Project
- Paste the URL for the new Bitbucket repo http://localhost:7990/scm/myc/mylibrary.git and enter the username and password for your Bitbucket server.
- Leave the Project name and Build configuration name as the defualts when prompted.
- Click on Build Steps and add the .Net CLI runner type and configure to build the library as previously with the additional step of setting the Configuration property to Release.
- Click on Build Steps and Add Build Step
- Select a Runner type of NuGet Pack
- Enter a Step name: of Package for NuGet Feed
- Use the default NuGet.exe selected
- In Specification files: select the MyLibrary.InContainer/MyLibrary.InContainer.csproj file from the repository tree. Add multiple projects if you want to pack multiple projects.
- Specify an Output directory: of build/packages
- Check Publish created packages to build artifacts
- Click Save and run the build to check for errors.
We then need to enable the NuGet feed
- Click on Projects/My Library in the top navigation and then Edit Project Settings.
- In the left menu, click on NuGet Feed (you may need to expand the menu)
- Click on Enable and then you should now see the URL for the NuGet feed http://localhost:8111/httpAuth/app/nuget/feed/Mylibrary/default/v2
- Click on Enable for Automatic Package indexing
- To enable the public feed (which we will do for this), click on Administration in the Top navigation, Authentication and then check Allow login as guest user.
- If you browse back to your NuGet settings under the library project http://localhost:8111/admin/editProject.html?projectId=Mylibrary&tab=packages you will now see a guest feed at http://localhost:8111/guestAuth/app/nuget/feed/Mylibrary/default/v2 which we will use in the other project.
- Run the Build again to populate the NuGet feed.
Adding the NuGet feed to the other solution (Windows Development Machine)
- Open the MyService.InContainer solution.
- In the Solution Explorer, expand the MyService.InContainer project and right-click on Dependencies, then click on Manage NuGet Packages.
- Next to the Package Source drop-down in the top right of the Package Manager, click the Settings cog.
- Click on the Plus sign to add a new feed and in the bottom assign a name such as My Feed and paste in the public NuGet feed URL
http://{your teamcity server address}:8111/guestAuth/app/nuget/feed/Mylibrary/default/v2.- Click Update then OK.
- Change the Package Source to My Feed and select the Browse tab.
- You should now see a MyLibrary.InContainer package
- Select the package and click Install.
You can now use your classes like any other feed!
Wrap Up
A few random thoughts
Networking as Code
It wasn't explored through this post, but the ability to include all the CI/CD code in the pipeline is useful. Many years ago, I scripted start to finish builds from Windows Server 2008 install through to SQL and Sharepoint and the customer code. This used Powershell and a lot of it. It also didn't really touch any of the networking infrastructure which is nice bonus with Istio and the supporting components.
Team City Plugins
There are plugins available for Kubernetes and other components. Apart from the NuGet step, I was pretty keen to use the Command Line because it would give me flexibility to build anything once I had the bones sorted.
Labeling Images
If you wanted to be more granular with your builds, it's easy for TeamCity to grab the Commit ID from Bitbucket and label the image with that. Using this in a more fully fledged branching strategy, you could use package labeling for the master and a combination of commit and package version for the development and test branches. However, discussing a branching strategy will cause a bigger flame war than language choice...
Merged Winix Scripts
Combining Unix and Windows scripting in the build process was really useful, and I'm leveraging for a few other things for container building.
Alpine .Net Core Debugging
I've tried a multitude of ways to get that operating, but over to Microsoft to get that running on Alpine.
Happy clustering!


